- Products
- Air Compressors & Air Tools
- Climate Control
- Compaction Equipment
- Concrete Cutting Tools & Equipment
- Concrete and Masonry
- Demolition & Excavation
- Electrical & Mechanical
- Fasteners and Anchoring Adhesives
- Floor Protection
- Generators and Welders
- Hand Tools
- Heaters
- Janitorial and Office Supplies
- Jobsite Protection
- Ladders & Storage
- Lighting & Lighting Accessories
- Man Lifts
- Material Handling Equipment
- Power Tools
- Pressure Washers & Pumps
- Safety Gear
- Safety Products
- Saws
- Surface Preparation
- SEASONAL PRODUCTS
- Rentals
- Air Compressor and Air Tool Rentals
- Climate Control Rental
- Compaction Rentals
- Concrete Equipment Rentals
- Demolition & Excavation Equipment Rentals
- Concrete Floor Grinder Rentals
- General Construction Equipment Rentals
- Generator Rentals and Welder Rentals
- Heater Rentals
- Light Tower Rentals
- Man Lift Rentals in Massachusetts and Rhode Island
- Material Handling Equipment Rentals
- Pressure Washer & Pump Rentals
- Saw Rentals in New England
- SEASONAL PRODUCTS
- Products
- Air Compressors & Air Tools
- Climate Control
- Compaction Equipment
- Concrete Cutting Tools & Equipment
- Demolition & Excavation
- Electrical & Mechanical
- Floor Protection
- Generators and Welders
- Construction Heaters
- Construction Ladders, Staging, & Storage
- Construction Lighting
- Man Lifts
- Material Handling Equipment
- Industrial Janitorial and Office Supplies
- Pressure Washers & Pumps
- Construction Safety Products
- Construction Safety Gear
- Surface Preparation
- Building Protection
- Diesel Accessories
- Zero Emissions
- Rentals
- Air Compressor and Air Tool Rentals
- Climate Control Rental
- Compaction Rentals
- Concrete Equipment Rental
- Demolition & Excavation Equipment Rental
- General Construction Equipment Rental
- Generator Rentals and Welder Rentals
- Construction Heaters Rental
- Light Tower Rentals
- Man Lift Rentals
- Material Handling Equipment Rental
- Pressure Washer & Pump Rentals
- Saw Rentals in New England
- Concrete Floor Grinder Rentals
- Zero Emissions Rentals
- Repairs & Used
- Parts
- Blog
- Services
- Resources
- About Us
- Contact Us
Sales & Rental of Construction | Industrial Equipment & Supplies


10 Tips for Choosing the Best Floor Tools for Global Buyers
Selecting the right floor tools can influence installation quality, worker safety, project speed, and long-term maintenance costs. For global buyers, the decision is rarely as simple as comparing prices online. A compact grout saw may suit a bathroom renovation, while a heavy-duty floor scraper is better for commercial refurbishment. Each project demands careful attention to flooring materials, working conditions, operator skill, and expected workload.
This guide presents ten practical tips for evaluating floor tools from international suppliers. It considers blade strength, handle comfort, dust control, replacement parts, packaging, and after-sales support. Experienced contractors often test balance and vibration before approving a tool. That small check can prevent hand fatigue during a long workday. Product specifications also deserve close review. Measurements, materials, voltage, and performance claims should be clear and verifiable.
Quality matters most.
Reliable buyers should examine supplier credentials, independent test reports, warranty terms, and communication practices. Regional safety requirements may differ, so professional advice and local compliance checks remain important. A reputable manufacturer should explain limitations instead of promising perfect results. No tool performs equally well on every surface. That is easy to forget. Even experienced teams can choose poorly when they focus only on a low unit price. Real purchasing decisions should compare total ownership costs, including maintenance, training, shipping, and downtime. By applying these principles, global buyers can build a more dependable tool list and reduce avoidable mistakes.
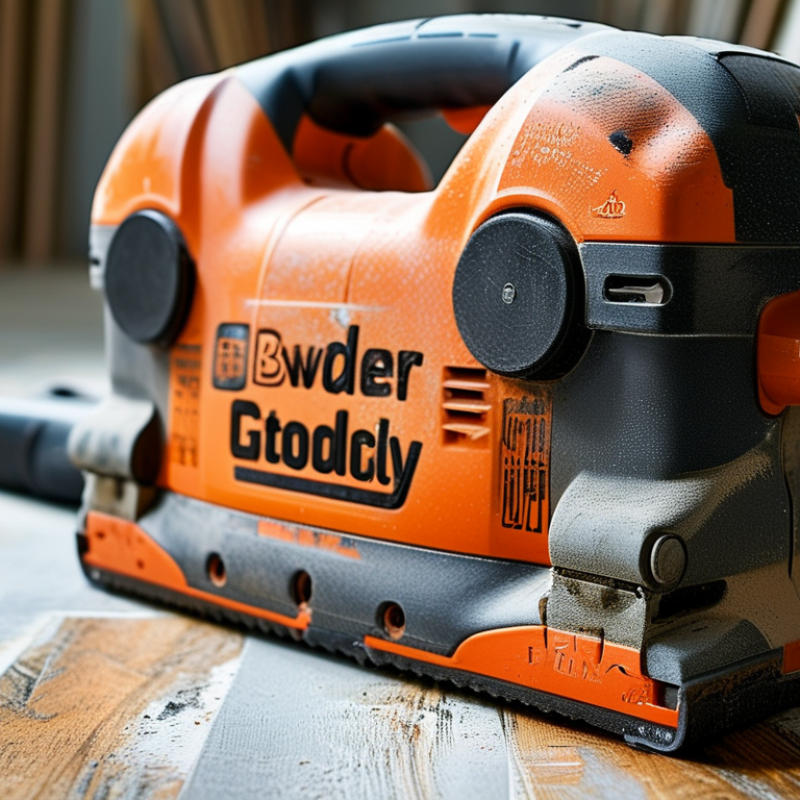
Table of Contents
[Hide]
Classify Floor Applications by ISO 13007, ASTM C627, Surface, and Tile Data
10 Tips for Choosing the Best Floor Tools for Global Buyers
Tip 1: Classify the installation before comparing tools. ISO 13007 helps identify adhesive and grout performance classes, such as strength, flexibility, and open time. These categories affect trowel size, mixing equipment, and cleaning tools. A large porcelain tile may need full mortar coverage, not a quick combing motion.
Tip 2: Read ASTM C627 results as system evidence. The Robinson floor test evaluates tile assemblies under repeated traffic and rolling loads. It does not certify one tool alone. Use the test level to select stronger cutting, spreading, and leveling equipment for commercial floors. I have seen buyers compare tool prices without checking the tested assembly. That shortcut can fail.
Tip 3: Record the surface details. Concrete moisture, flatness, dust, texture, and existing coatings change tool performance. Rough concrete may require a heavier-duty mixer and deeper trowel teeth. Smooth surfaces need careful bonding preparation. Check tile data, including size, thickness, porosity, weight, and joint width. Small mosaics need different handling from thick slabs.
Tip 4: Ask suppliers for measurable specifications. Request blade durability, cutting depth, mixing capacity, spare-part availability, and safety documentation. Confirm whether measurements follow recognized standards. A practical trial remains valuable. Test one sample tile on the actual substrate. The result may challenge your first choice. Global buyers should also check voltage, language instructions, packaging strength, and local service access before placing large orders.
| Tip | Floor Application | ISO 13007 / ASTM C627 Reference | Surface and Tile Data | Recommended Tool Set | Selection Criteria | Practical Note |
|---|---|---|---|---|---|---|
| 1 | Standard indoor residential floors |
ISO 13007 C1 or C2 cementitious adhesive, selected according to the project specification. ASTM C627 Residential or light-commercial performance target where specified. |
Ceramic or porcelain tile Typical tile size: up to 600 × 600 mm Absorption: verify tile classification and manufacturer data Sound, clean concrete or cement-based screed |
6 × 6 mm or 8 × 8 mm square-notched trowel Rubber grout float Tile spacers Mixing paddle and clean bucket |
Match the trowel notch to tile size, tile back profile, substrate flatness, and adhesive coverage requirements. Use a margin trowel to scrape adhesive from edges. | Notch size is not universal. Lift a tile periodically to verify coverage before the adhesive skins over. |
| 2 | Large-format and gauged porcelain tile |
ISO 13007 C2 adhesive is commonly specified for demanding porcelain applications; T, E, or S1 may be required by the project specification. ASTM C627 Select the performance level required for the intended traffic. |
Tile edge commonly greater than 600 mm Large surface area with limited tolerance for voids Rigid porcelain body Substrate flatness must be checked over the tile span |
10 × 10 mm or 12 × 12 mm notched trowel, subject to coverage testing Large-format tile mortar bed comb Suction handles Tile-lifting and adjustment tools |
Use back-buttering where required and comb adhesive in one direction. Check for adequate contact at corners and along edges. | Large tiles amplify substrate irregularities. Correct the substrate before increasing adhesive thickness. |
| 3 | Wet rooms, bathrooms, and shower floors |
ISO 13007 Choose adhesive and grout classes appropriate for moisture exposure; CG2 or RG grout may be specified depending on chemical and hygiene requirements. ASTM C627 Use the project-required traffic classification. |
Porcelain or low-absorption ceramic tile Sloped substrate toward drainage Frequent water exposure Movement joints and waterproofing layer required where applicable |
Small-format notched trowel Rubber grout float Squeegee and sponge system Slope gauge, level, and drain-detail tools |
Confirm waterproofing compatibility, drainage slope, joint layout, and grout cleanability. Keep movement joints free of rigid grout. | Tile and grout are not a substitute for a properly designed waterproofing system. |
| 4 | Exterior balconies, terraces, and façades |
ISO 13007 C2 adhesive with appropriate deformability, such as S1 or S2, may be required where thermal movement or substrate movement is expected. ASTM C627 Traffic classification applies to accessible floor areas, not façade panels. |
Freeze-thaw or thermal cycling may occur Porcelain is often selected for low water absorption Exterior concrete, screed, or rendered substrate Exposure to rain, sunlight, and temperature change |
Full-coverage notched trowel system Exterior-rated grout float Joint-width gauge Long level, straightedge, and expansion-joint tools |
Verify exterior suitability, open time, substrate moisture, drainage, movement joints, and required adhesive coverage. Avoid trapped voids in exposed installations. | Local frost, heat, and movement conditions must be assessed before choosing the adhesive class. |
| 5 | Commercial corridors, retail areas, and offices |
ISO 13007 Adhesive and grout selection should follow the specified durability, open-time, slip, and deformability classes. ASTM C627 Moderate or heavy commercial target may be specified according to expected traffic and wheeled loads. |
Porcelain or dense ceramic tile Frequent pedestrian traffic Possible rolling carts and maintenance equipment Concrete substrate with joints and transitions |
Heavy-duty notched trowel Mechanical mixing paddle Tile cutter or wet saw suited to tile thickness Professional grout float and joint-cleaning tools |
Select tools for production speed without sacrificing coverage. Confirm the tile surface is resistant to scratching and grout staining. | ASTM C627 is a laboratory floor-system test; use the specified test rating rather than assuming a rating from tile type alone. |
| 6 | Supermarkets, public buildings, and heavy-use floors |
ISO 13007 Use the adhesive and grout classes stated in the design specification for high-demand service conditions. ASTM C627 Heavy or extra-heavy commercial performance may be required where applicable. |
Dense porcelain or quarry tile High pedestrian traffic and wheeled loads Repeated cleaning and possible impact Flat, structurally sound substrate required |
Robust mixing and measuring equipment Full-coverage trowel system Heavy-duty wet saw Hard-wearing grout float and floor protection tools |
Confirm adhesive working time, compressive and shear requirements in the specification, grout chemical resistance, and protection during curing. | Traffic ratings depend on the complete tested floor assembly, including substrate, adhesive, grout, and tile. |
| 7 | Mosaic sheets and small-format tiles |
ISO 13007 Choose adhesive and grout classes compatible with the substrate, wet exposure, and joint configuration. ASTM C627 The required floor-system rating still depends on the intended use. |
Mosaic modules commonly below 50 × 50 mm Many joints and narrow contact areas Paper-faced, mesh-mounted, or dot-mounted sheets Uneven surfaces can telegraph through the mosaic |
3 × 3 mm or 4 × 4 mm notched trowel Fine-tooth grout float Rubber grout squeegee Soft brush and detail-cleaning sponge |
Use a notch that avoids adhesive rising into the joints. Flatten ridges before placing sheets and align module lines carefully. | Always test sheet release, mesh adhesion, and grout-cleaning behavior on a sample area. |
| 8 | Natural stone and moisture-sensitive tile |
ISO 13007 Adhesive class must be checked for compatibility with the stone, including discoloration and moisture sensitivity; project specifications may require specialized cementitious or reaction-resin products. ASTM C627 Apply the required floor-use rating to the complete system. |
Marble, limestone, travertine, or other natural stone Variable porosity and thickness Potential for warping, staining, or show-through Substrate must be stable and properly prepared |
White adhesive application tools where specified Fine notched trowel Non-staining rubber float Suction handles and soft cleaning pads |
Confirm stone sensitivity, adhesive color, bed thickness, moisture limits, and compatibility with sealers or membranes. Use a mock-up before full installation. | Natural-stone suitability cannot be determined from appearance alone; consult the tile technical data. |
| 9 | Renovation over existing tile or difficult substrates |
ISO 13007 Adhesive selection should reflect the existing surface, required adhesion, and any movement or deformability in the assembly. ASTM C627 Existing substrate conditions must be included in the floor-system evaluation. |
Existing ceramic or porcelain tile, concrete, or cement board Possible contamination from wax, grease, or cleaning products Variable surface roughness and bond strength Height restrictions at doors and transitions |
Scraper and surface-preparation tools Diamond abrasion or grinding equipment where appropriate Primer application roller or brush Low-profile notched trowel |
Test bond strength, remove contaminants, repair hollow or loose areas, and verify flatness. Follow the selected primer and adhesive instructions. | Do not install over loose tile, weak surfaces, active moisture problems, or unverified contaminants. |
| 10 | Final quality control and global project compliance |
ISO 13007 Record the applicable adhesive and grout designations, such as C1/C2, T, E, F, S1/S2, CG1/CG2, or RG, only when supported by product documentation. ASTM C627 Request the specified Robinson floor-test classification for the complete assembly where required. |
Tile dimensions, thickness, absorption, and surface finish Substrate type and flatness Joint width, movement-joint layout, and exposure Installation temperature and curing conditions |
Straightedge and calibrated level Coverage inspection tools Digital scale and clean measuring containers Moisture meter where appropriate Documentation and inspection checklist |
Compare tile data sheets, adhesive and grout classification, test reports, installation instructions, and local building requirements before purchasing tools or materials. | Standards, editions, and national adaptations can differ. Use the version named in the contract or local regulations. |
| Reference note: ISO 13007 classifications describe requirements for ceramic tile adhesives and grouts, while ASTM C627 evaluates the service performance of a complete installed floor system using the Robinson-type floor tester. Neither standard alone determines the correct tool size; tool selection must also consider tile dimensions, back-profile, substrate flatness, coverage requirements, joint width, and installation conditions. | ||||||
Related Posts
-

How to Choose the Best Propane Heaters for Your Home Needs?
-

Top Machine Tools for Precision Engineering You Need to Know About
-

What is the Best Propane Heaters for Your Home Use?
-
Top 10 Contractor Tools You Need for Efficient Projects?
-

2026 How to Select the Best New Construction Tools for Your Projects?
-

Top Machine Tools for Precision Engineering and Their Impact on Industry?

© Copyright - Pro Tool & Supply - Site by SVM E-Marketing Solutions - Sitemap
- Privacy policy